
Working With Chaining
What is Chaining?
The Chaining Concept
Snippets can be made to trigger other snippets, chaining them together one after another. You can chain together as many snippets as you like.
Chaining With Text Complete
The shortcut of one snippet needs to match the end of (or all of) the snippet text of another:
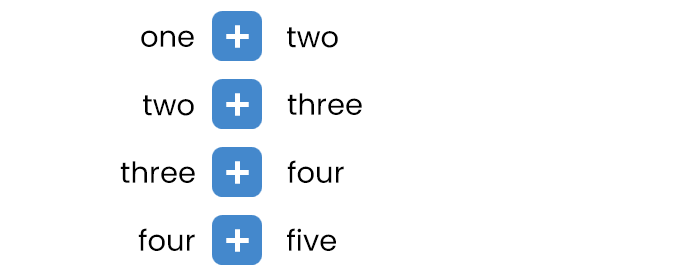
Expanding the first snippet (by hitting TAB) automatically triggers the second. Expanding the second triggers the third, and so forth:

Chaining With Text Replace
The above example uses snippets in text complete mode, but you can also chain snippets in text replace mode:
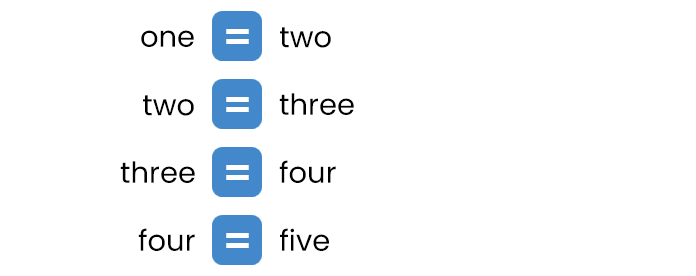
This of course causes the text to continually replace itself if you keep hitting TAB:

You might wonder why you would do this! Further down the page we outline some example use cases of chaining with both text complete and text replace modes. You might be surprised how versatile chaining can be!
 Instant Text Replace
Instant text replace snippets will become non-instant when they are chained off of another snippet.
The Chain Button
A Quick Way To Set Up Chaining
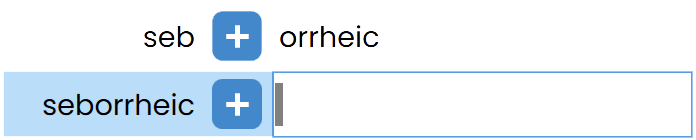
PepperText has a chain button as part of its snippet tools at the top of the snippets page:

First select the snippet you want to chain from:

Then when you hit the chain button a new snippet will be created, chained off of the first. It will be ready for you to fill in the new snippet text:
 It's Optional
The chain button is not required to set up chaining, but it can save time. You can always just type in matching text yourself.
Example Uses
Phrase Building
When you have multiple phrases that start with the same text you can chain the pieces together in order to expand out the phrase you want. This can save you from having to think of different shortcuts for similar phrases:

The above example allows you to shortcut your way through to the desired phrase.
 Remember
The order of your snippets in the snippet list will determine the order they appear in the preview. Keep the most common shortcuts higher to save time.
Optional Extensions
Sometimes you want a shortened version of a phrase, for example, 'Valsalva', and sometimes you want the full phrase, 'Valsalva manoeuvre'.
Instead of having to select between the two options with multiple choice:
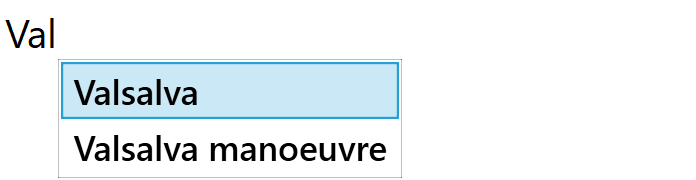
You can instead use chaining to expand the first part of the phrase, then expand the second part only when you want it:


Optional Alterations
Similar to above, sometimes a phrase has multiple forms, such as whether it's plural or not. Instead of choosing between the forms with multiple choice, we can just expand the base form and decide if we want to amend it after, via chaining.
This example is expanding the term 'actinic keratosis' and offering the additional change to make it plural at the end:

 Trigger Settings
In this example we would use trigger settings to prevent the shortcut 'is' from suggesting the snippet 'es' every time it's typed. It will only suggest the replacement when it appears in the relevant word (keratosis). Learn more about trigger settings here →
Labels
In this example we're also using a label to show a more meaningful preview "(plural)" instead of the actual text that gets inserted, "es". This makes it easier for the typist to understand. Learn more about labels here →
Chain Linking
Chain linking uses chaining to link sections of text together using text replace 'links'. The links are the text that trigger the next snippet, and are replaced when they are expanded.
In this example the links are designated with square brackets (not a requirement!):
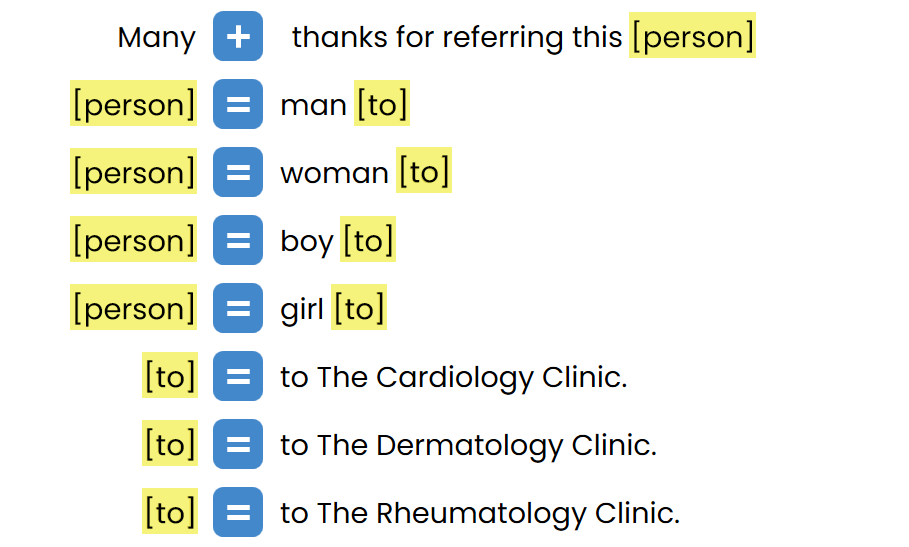
A pre-defined sentence can be expanded in stages, while choosing the multiple choice options along the way:

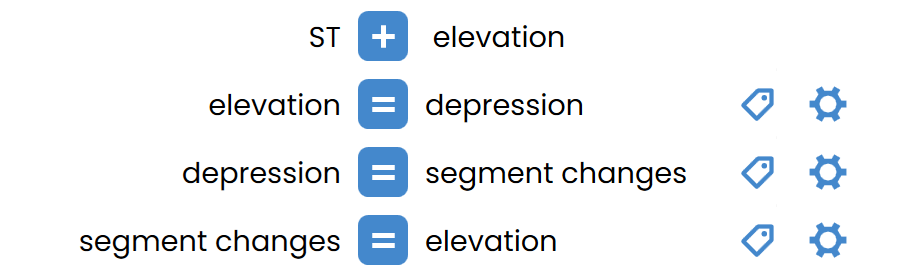
Choice Cycling
It's also possible to set up your multiple choice snippets to cycle through the options via chaining (with text replace), instead of selecting from a multiple choice list. Expanding each option will trigger the next option to appear. You just keep TAB-ing through the options until you get to the one you want:
 Trigger Settings
In this example we would use trigger settings to prevent the shortcuts from being triggered unless they follow the custom text 'ST'. This prevents unwanted previews every time you type 'depression', 'elevation', etc. Learn more about trigger settings here →
Labels
In this example we're also using labels to display arrows in front of the preview text as an indicator that we're using choice cycling (completely optional!). Learn more about labels here →
Shortcut Swapping
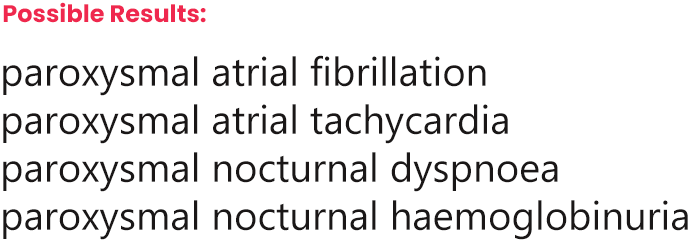
Shortcut Swapping uses chaining with text replace to swap out shortcuts one after another until you reach a final shortcut that expands the snippet you want. This can create a menu hierarchy:

The above example uses shortcut swapping to select an ICD10 chapter, then a sub-section, etc. until we narrow in on the ICD10 code we're looking for. Once we have an ICD10 code we're also expanding an optional extension to get a more specific ICD10 code.
Shortcut Building
Similar to Shortcut Swapping, Shortcut Building can also be used to traverse a menu and narrow in on a final snippet. The difference is that we use text complete snippets to expand parts of a final snippet, building up to the one we want:

The above example is achieving the same result as the example in Shortcut Swapping, but we're using Shortcut Building to achieve it.
Shortcut Swapping vs Shortcut Building
Shortcut Building can be a better option in some cases. If you accidentally expand the wrong choice from the menu, you can simply backspace over that part of the shortcut you're building and the menu will appear again.
Another benefit of shortcut building is in avoiding clashing shortcuts. You don't need to worry about having identical shortcut parts in your menu, they are attached to their parent shortcuts which keep them differentiated.
Shortcut Swapping on the other hand is easier to set up initially and easier to remember, which makes it easier to jump into the menu at different points - instead of always starting from the root shortcut.
